I’ve printed hundreds of D&D figures of all sizes and I only had an handful of failures because of supports: all thanks to Prusa Slicer!
In this post I’ll guide you during the setup of the slicer to configure your non-prusa printer. Next, we’ll use it to generate super strong and reliable automatic supports.
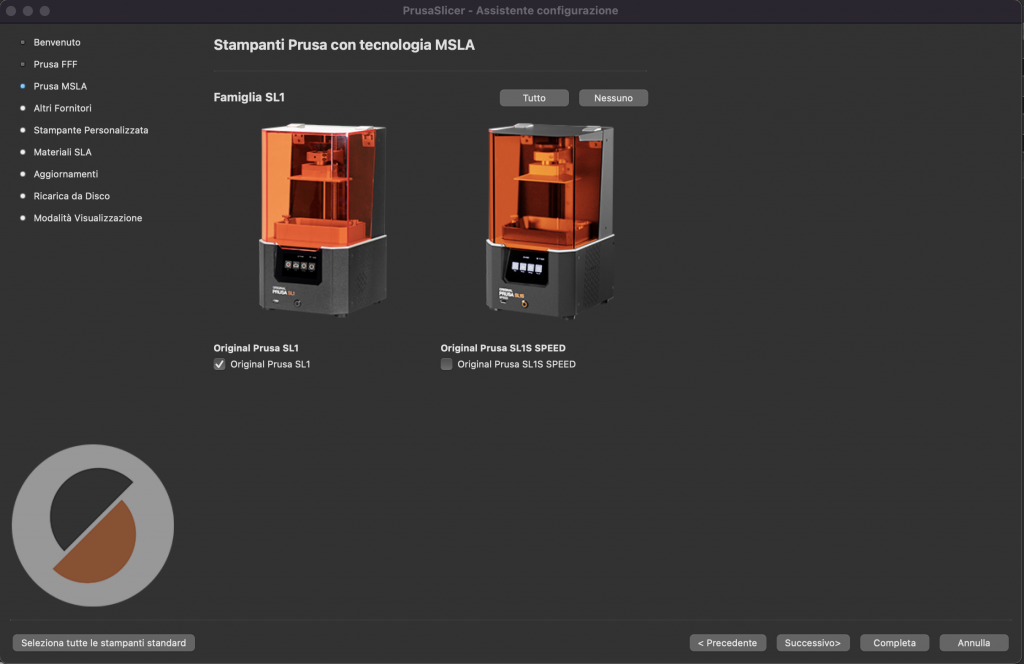
First of all, obviously, download and install it. When running the program the first time you will see a wizard to configure the printer. Deselect the pre-selected printer in the Prusa FFF step, select “Original Prusa SL1” in the Prusa MSLA step and press complete to open the main GUI.
In the next screen, look at the top-right and:
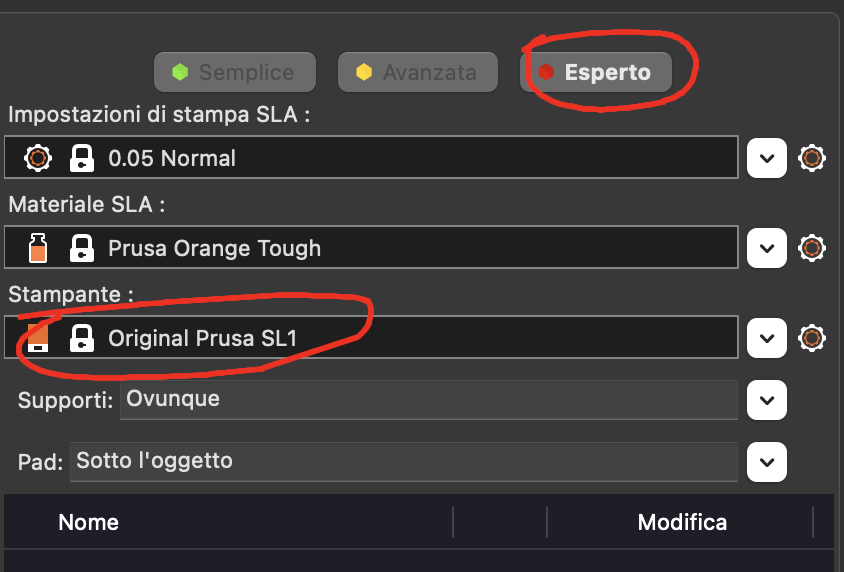
- Click the “Expert” button
- Make sure you have “Original Prusa SL1” as the selected printer
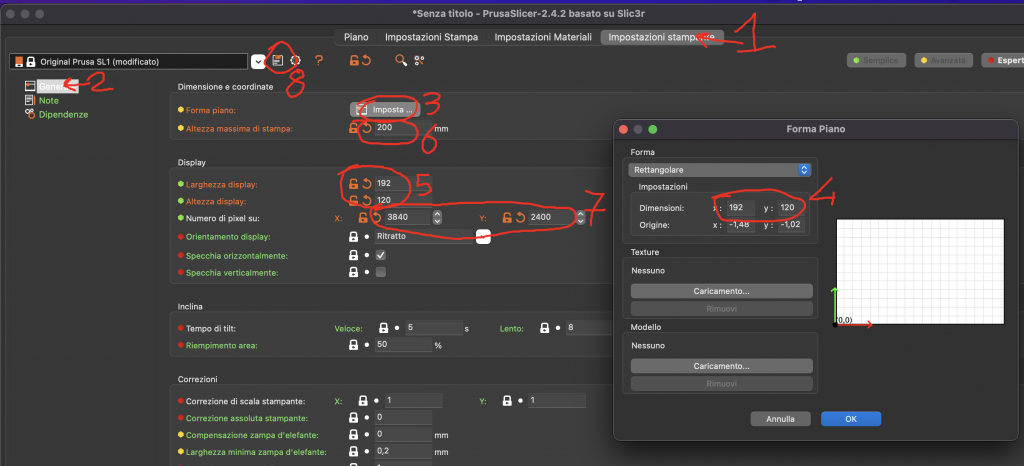
Now, press “Printer settings” (1) in the top, then “General” (2) on the left, then “bed shape – Set” (3) on the top center and a popup will appear. In this popup you must change the bed dimensions (4) from [118, 66] to the values of your printer. I have a Saturn so I set 192 x 120. The same value must be set in the “Display width” and “Display height” section (5). You want to change also the “Maximum print height” (6) and the pixel resolution (7), and finally save (8).
Now you can go back to the main screen and the print bed will match your printer!
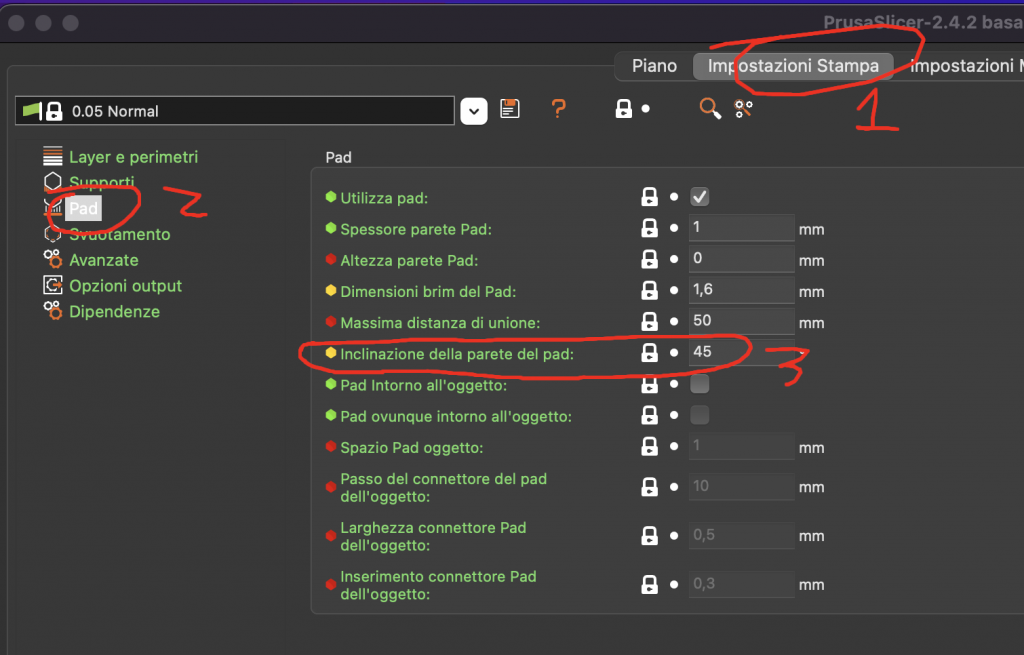
One last configuration not strictly needed will give you a very simple time when removing the print from the build plate: go to “Print settings” (1), “Pad” (2) and make sure that “Pad Wall Inclination” (3) is set to 45 degrees!
Now we are ready to create our supports! This is pretty straightforward:
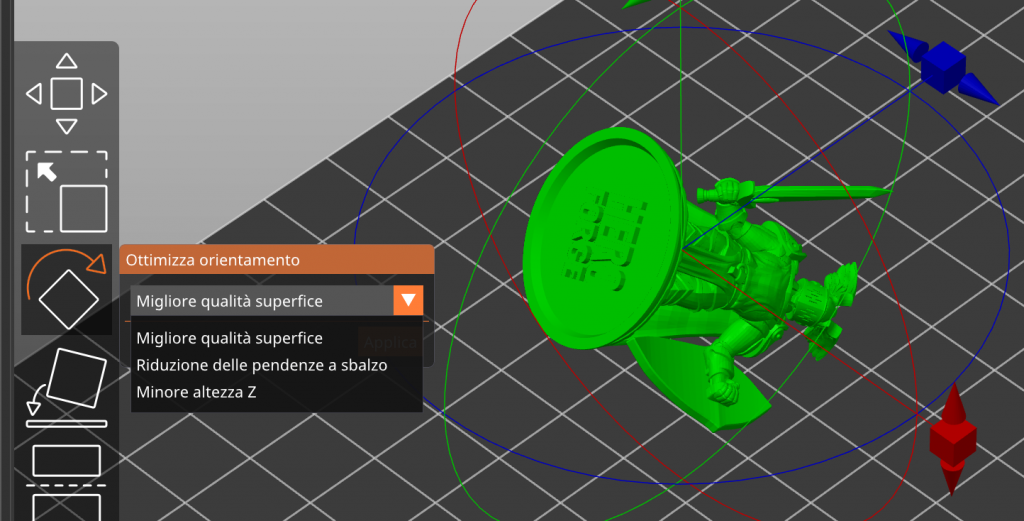
First of all, import your 3d model! Then, move to the orientation tool on the right. An “Optimize orientation” tool will popup up, letting us choose the orientation strategy between best quality, less supports and less Z height. The first is the best, but it usually create some problems with swords or pointy parts of the model. If your model has very long and thin parts, you want them horizontal or pointing up. If the automatic rotation rotates them pointing to the bed you can either change rotation strategy or manually add additional supports to that point.
You may want to use “less supports” if you don’t care about perfection: the print will look awesome anyway.
If you really don’t care about perfection at all, you may want to apply “less Z height” to speed up the printing process.
Now that the object is rotated, go to the support tool and press “Automatically generate points” to create the supports. You can tweak the point density if you want to apply less or more points: I usually keep it around 80%
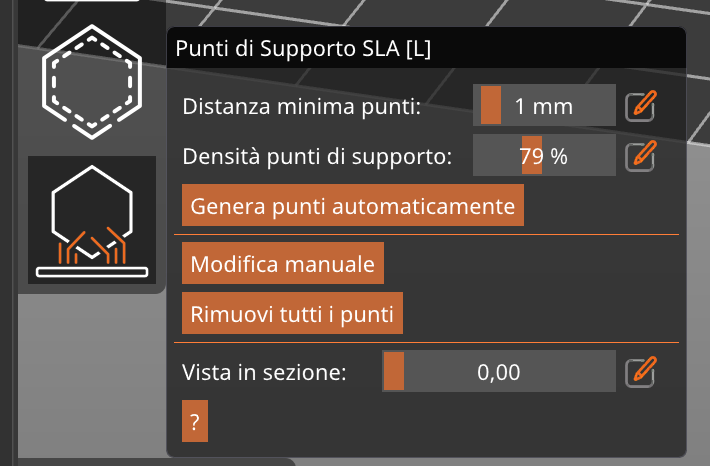
Now you are all set!
The last thing to do is File -> Export -> Export to STL including supports.
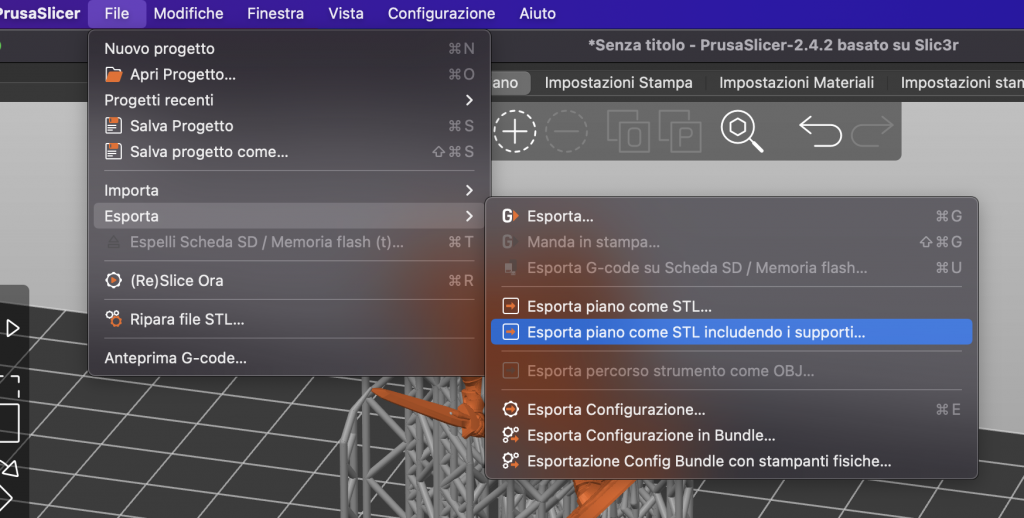
Congratulations! You now have a fully supported STL that you can import in your slicer to print 🙂
If you liked this guide, leave me an heart and a comment!
