Initialization
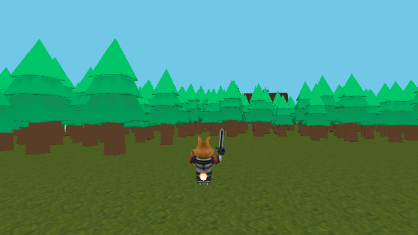
Since this is a third-person game in an out-world map, a collision system has also been implemented to avoid player interpolation with objects and to move the camera away if there’s an object obscuring the player.
During the application initialization, the map file is parsed and all the static content is generated before the first render pass, like:
- The model matrices of the static objects and their AABBs
- The points composing the trails (odors and footprints)
- The AABBs tree hierarchy used to speed up calculations
3d Model creation
Since the map has a lot of trees, it’s not feasible and useless to draw them one by one by sending the triangle information to the GPU every time.
To draw the trees we’ll use the method glDrawElementsInstanced(…) that lets us send the triangles only once to draw the same model multiple times.
Also, since the matrices are too many we can’t send the information as we do with a ”standard” uniform object, but we have to use a buffer that contains the data.
The algorithm used is the following:
- Load the tree model mesh
- Create a list of matrices with the transformations of each tree
- Pass the list using a Uniform Buffer Object
- Call glDrawElementsInstanced() with the number of objects
- Access the correct matrix in the vertex shader by using the gl InstanceID index that comes with it
Player Movement
The player can only move along the X and Z axis, and rotate around the Y axis, meaning that its position can be described using these three values: posX, posZ and rotationY.
When the player presses W, A, S or D, the posX and posZ values are updated accordingly. The rotationY changes when the player moves the mouse while pressing the mouse right button.
The Y rotation is always possible, as the player collider is described by a squared AABB that doesn’t change when the player rotates.
On the contrary, the movement along the X and Z axis can be blocked by obstacles like trees and so a collision must be checked to see if that movement is allowed.
Collision detection
- As root of the tree, an AABB with the same size as the map is created
- Next, we split that AABB in 4 sub-AABBs of equal size and add them as its children
- The same operation is executed for those 4 AABBs, resulting in a tree with 1 AABB in the first level, 4 in
the second level and 16 in the third - For each object in the map, we add it as child of all the third-level AABB that collides with it, using the AABB vs AABB collision check
The player must be blocked only in the direction that collides with the object, and not also in the other. In this way, when the player bumps into an object, it slides in the free direction instead of staying completely still.
Camera
In a similar way, the AABB with the camera and the player as vertices is matched against the AABB hierarchy. After this step, a more narrow collision check is applied.
Since the camera starts in free space, in the majority of the cases it’s the camera that will directly collide with an object; the only exception would be an object that enters in the line between the camera and the player, but this is less likely.
So, in this step we simply check:

In the most narrow step, we need to do the real AABB-Segment check to see if any point in the camera-player segment
collides with one of the AABB.
To do this we:
- Calculate the equation of the line passing through the camera and the player in the y = mx + c form
- Substitute the minX, maxX, minY and maxY AABB values in the equation to find the intersection points
- If one of this points is inside the AABB, then it collides with the line
Based on the collision check, we then move the camera closer or further away from the player.
Witcher senses
Camera distance
Moving the camera closer to the player is just a matter of decreasing the maxCameraDistance and adding a check before applying the previously described camera algorithm:

Grey effect
This effects darkens the whole scene and additionally darkens the right and left side, and it’s applied in the fragment shader:
- Add a vec3(value) to all the fragments color
- Take the parable x2+x, with y=0 in x=-1 and x=0
- Raise it by 0.1, to have y=0 in the points x ∼ -0.9 and x ∼ -0.1 instead
- Shift the uv.x value by -1, to have it in the range (-1,0) instead of (0,1)
- Calculate the y parable value using the shifted uv.x
- Clamp the resulting y in the range (0,1)
- Add another vec3(y) to the fragment color
You can see the result in the next section, as this is done along with the pincushion distorsion.
Pincushion distorsion
To apply the pincushion distorsion to the whole scene, we need an additional render pass.
In the first pass, the scene is rendered to a frame buffer with an attached texture. In the second pass, the texture is applied to a plane in front of a camera and the fragment shader applies the distorsion.
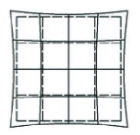
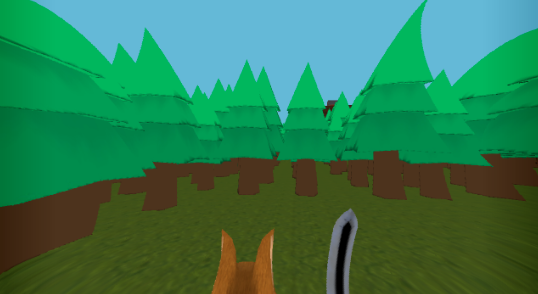
The code of the pincushion distorsion, alongside with the image darkening, is the following:

And here is the final result:
Outline Effect
In the witcher, the outline is along the object and the intersection with the player, and it’s also half inside and half outside the object. To achieve this effect, we’ll need to add another frame buffer with a second texture that we will use to render the border on top of the baseline scene texture.
For example, let’s look at this scene:
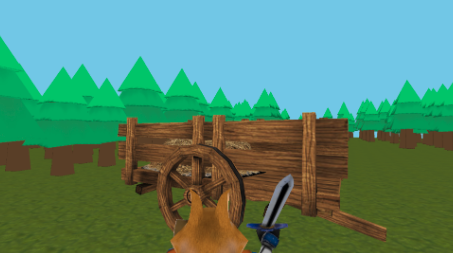
To create the texture we’ll make use of the stencil buffer, that lets us add and remove color information to it. In the first step, we disable the rendering to the texture and enable the writing to the stencil buffer:

We then draw the object, then change the stencil buffer operation to GL_ZERO and draw the player. The result will be the removal of the player silhouette from the stencil buffer:
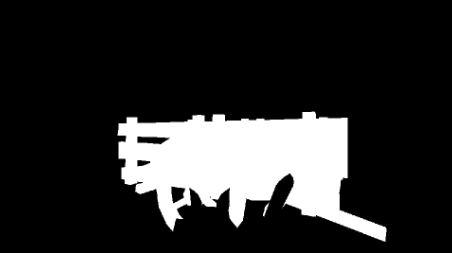
Now that we have the information on the stencil buffer, we re-enable the writing to the render buffer, disable
the writing to the stencil buffer and set the stencil operation to draw only where the value in the stencil buffer is 1.
With this setting, we write on a blue texture using the red color, achieving this result in the frame buffer texture:
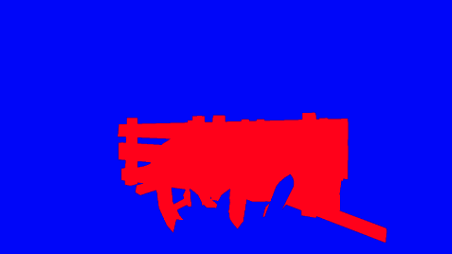
With this texture, we can now draw the border in the vertex shader using this algorithm, where I keep only the fragments in the overlapping border:

And this is the result:

Odor effect
The second witcher sense creates an odor scent that can be followed. To achieve this effect, we start with a list of key points of the trail and create a Kochanek–Bartels spline passing through it.
Once we have the list of points, we can draw them by calling:![]()
We have now drawn the points, and we have to add a step to transform them in particles: we will use the Geometry shader for that. It receives in input the points and tranforms each one into a quad with the normal directed to the camera:
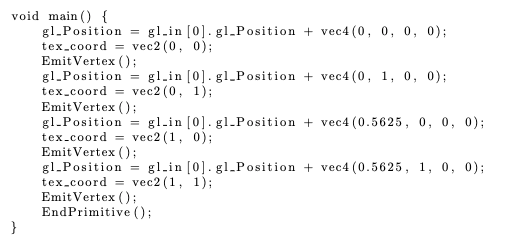
he tex coord variable that contains the UV of the freshly created quad is then passed to the fragment shader to draw the image from the given texture. This is the final result:

Footprints
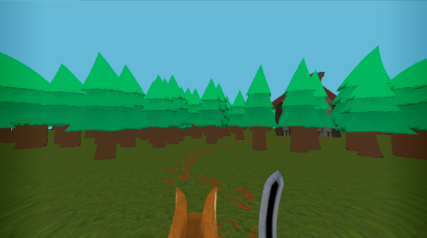
The third sense is similar to both the previous, meaning that a footprint path appears and it’s meant to be followed to a destination.
To achieve this effect we start with the same approach as per the odor trail by reading the key points in the map. But since we now need the footprints to be approximately at the same distance from each other, we calculate a very high number of intermediate points (100 for each segment) and then pick a subset of points at the same distance.
Once we’ve defined the points, we need to rotate the footprint object (which is a plane) to orient it towards the next one:

Performance
Even with three render passes and the geometry shader, the frame rate is above 60fps in every state of the gameand the only bottleneck that caused very low fps was observed before the implementation of the UBO for the
trees.
Other performance optimizations were applied, such as:
- Precalculating every static object attributes during the scene load
- Delaying all the calculation until strictly needed with ifs and early returns
- Switching the shader program to avoid passing through the geometry shader when not needed
- Applying 3 different collision detection phases to the camera/objects checks
- Avoiding application of effects and the usage of the additional stencil buffer when not needed
